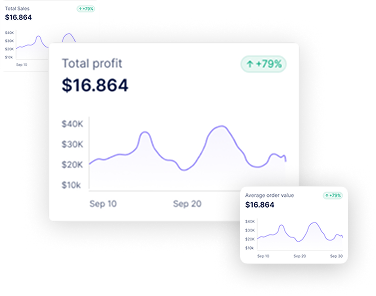
The Custom Report Builder in Reportgenix is a dedicated feature designed to give Shopify store owners complete flexibility in creating and managing custom reports based on their store data. It provides an intuitive interface where users can select data points, apply filters, customize layouts, and automate report generation all without the need for technical expertise.
With Report Builder, users can use pre-set templates. Instead, they can build reports to their unique business needs, whether for sales analysis, customer insights, product performance, financial tracking, or operational reporting.
The Reports Dashboard under the Report Builder section allows Shopify store owners to view, manage, and create custom reports easily. This page provides access to all existing reports, their segments, segment pages, and action options like edit, duplicate, or delete.
Navigation Steps #
1. Access Reportgenix App #
- From your Shopify admin panel, locate the Apps section → click on Reportgenix
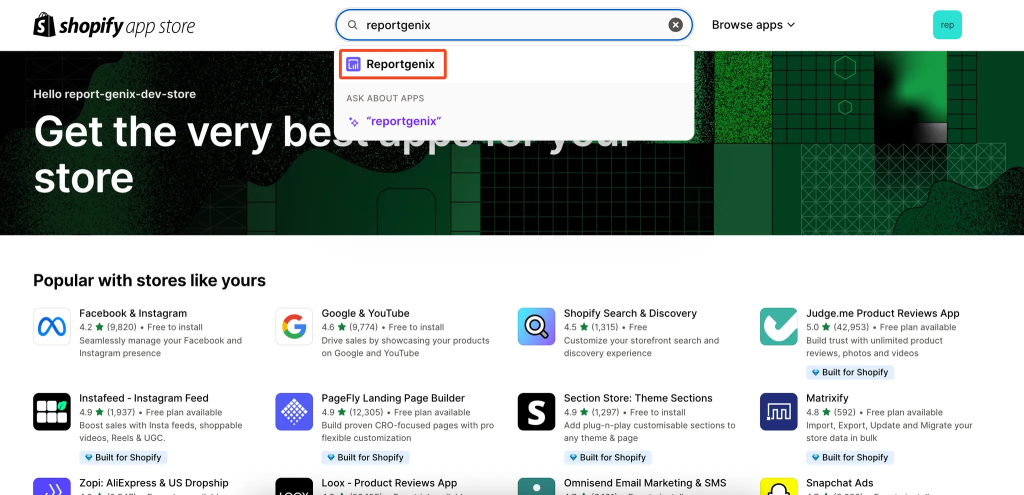
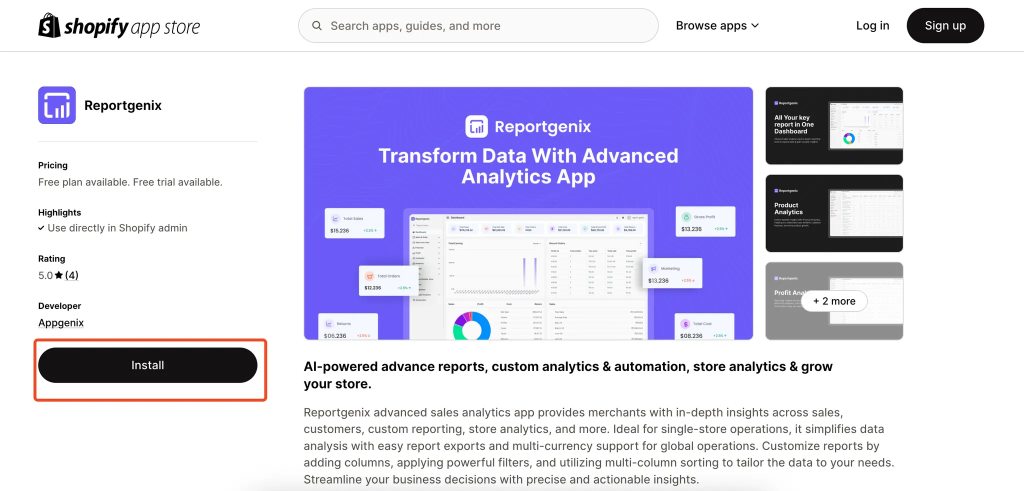
2. Navigate to Report Builder #
- Located on the left-hand side navigation menu.
- Clicking on Dashboard will bring users back to the main overview of the Reportgenix app.
- Useful for quickly returning to overall app analytics and insights.
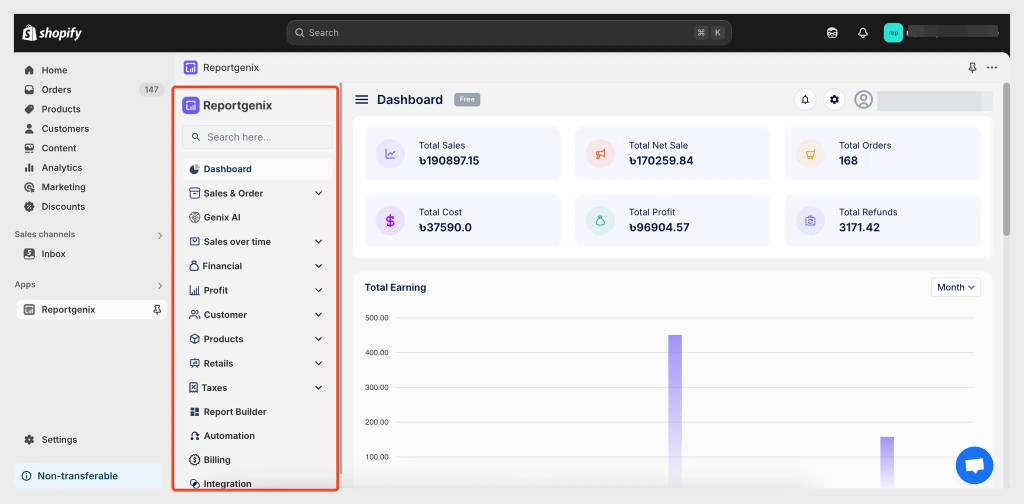
- Clicking here will open the Report Builder interface, where all custom reports are listed.
- This is the main working area for managing reports.

- Clicking → Add New Report opens the report creation interface.
- Users can create a new report by selecting data segments, applying filters, and customizing the layout.
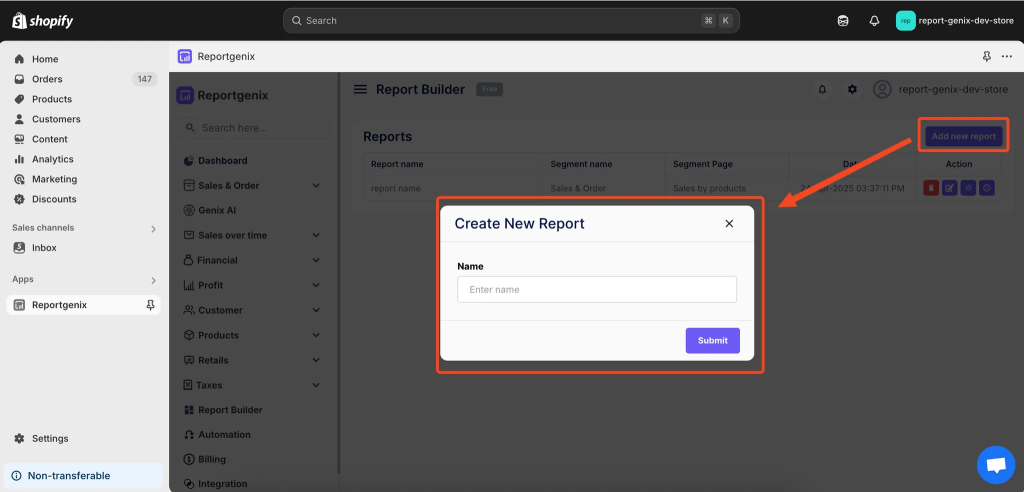
3. Action Buttons Explained #
Button one- Delete Report #
Permanently removes the selected report from your list.
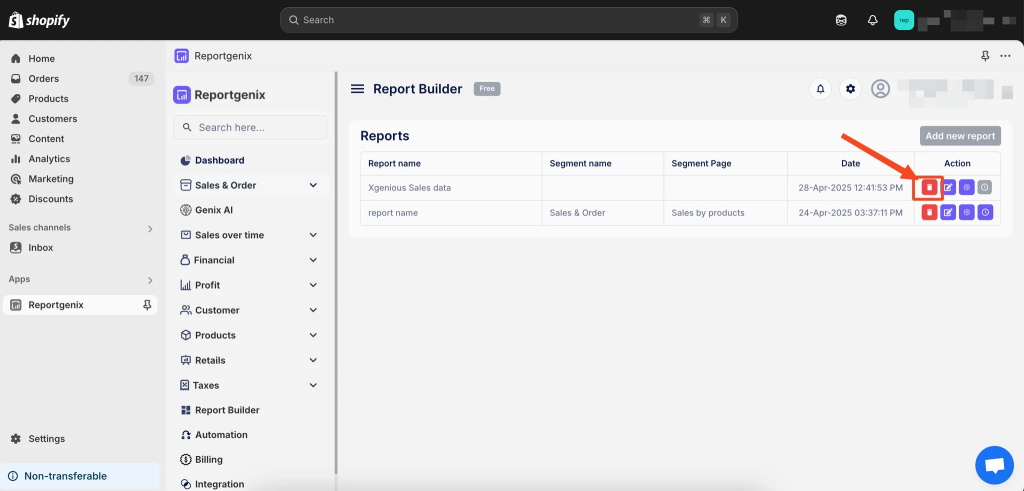
- Click on the first icon.
- A confirmation dialog will appear.
- Confirm deletion to remove the report.
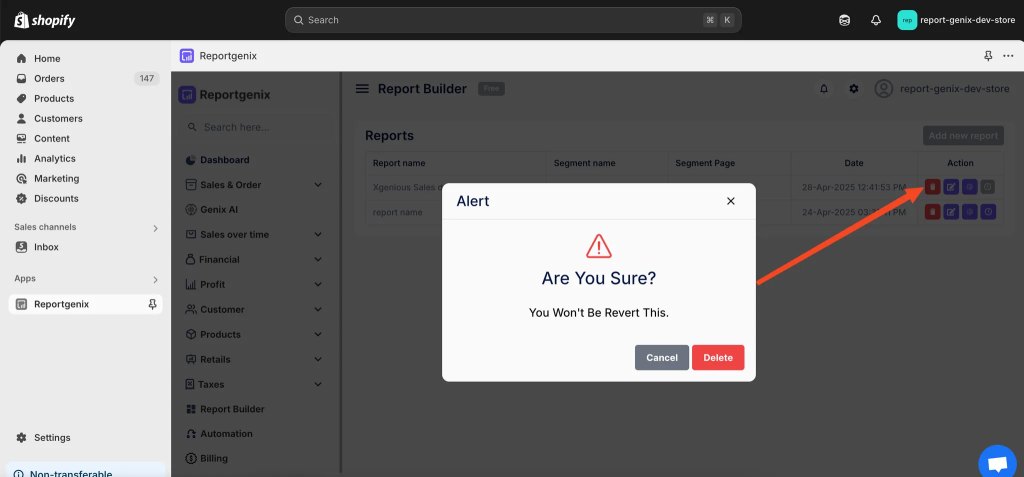
Note: Deleting a report is irreversible. Ensure you have backed up any necessary data before proceeding.
Button Two – Edit Report Name
Allows quick editing of the report’s title.
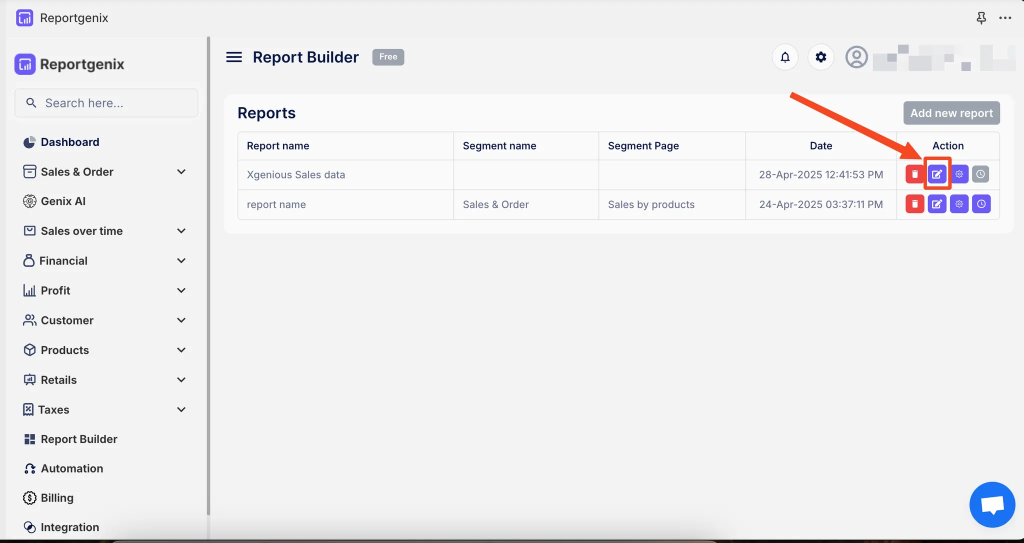
- Click the pencil icon.
- A text input field will appear.
- Enter the new report name and save changes.
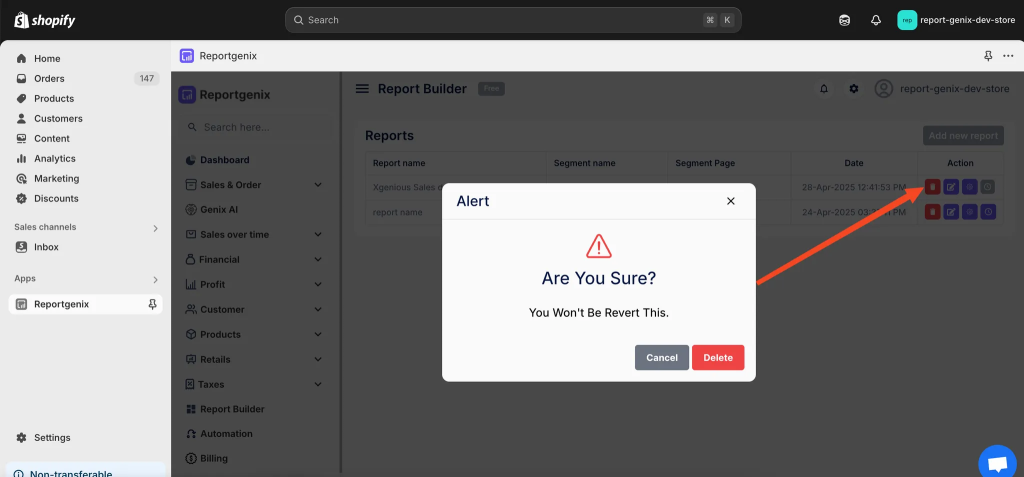
- Deleting a report is irreversible. Ensure you have backed up any necessary data before proceeding.
Button Two – Edit Report Name
Allows quick editing of the report’s title.
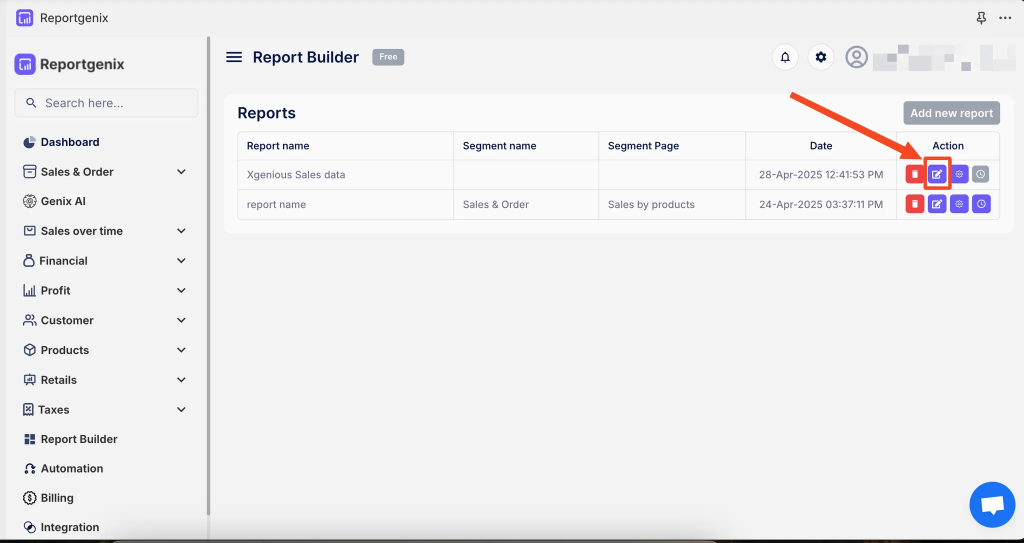
- Click the pencil icon.
- A text input field will appear.
- Enter the new report name and save changes.
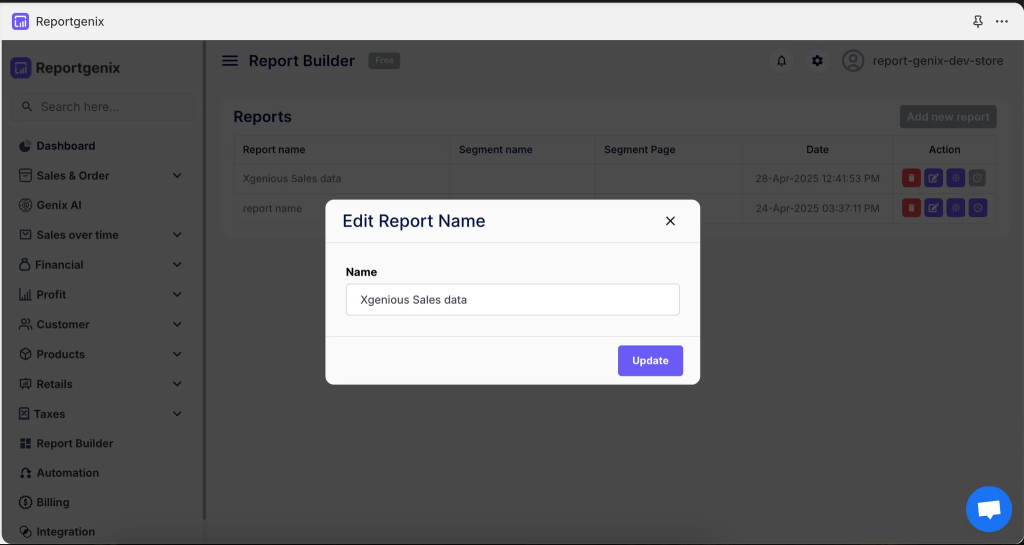
- Use descriptive names to make it easier to identify reports later
Button Three – Report Setup
Opens the detailed setup interface where users can modify:
- Data fields
- Filters
- Sorting and grouping options
- Click the gear/settings icon.
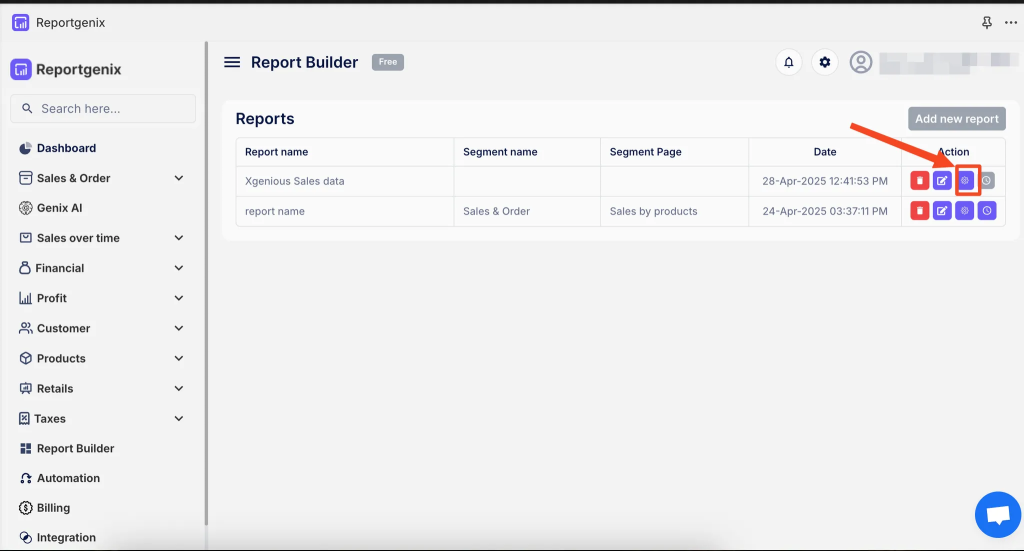
- The report editor interface will open.
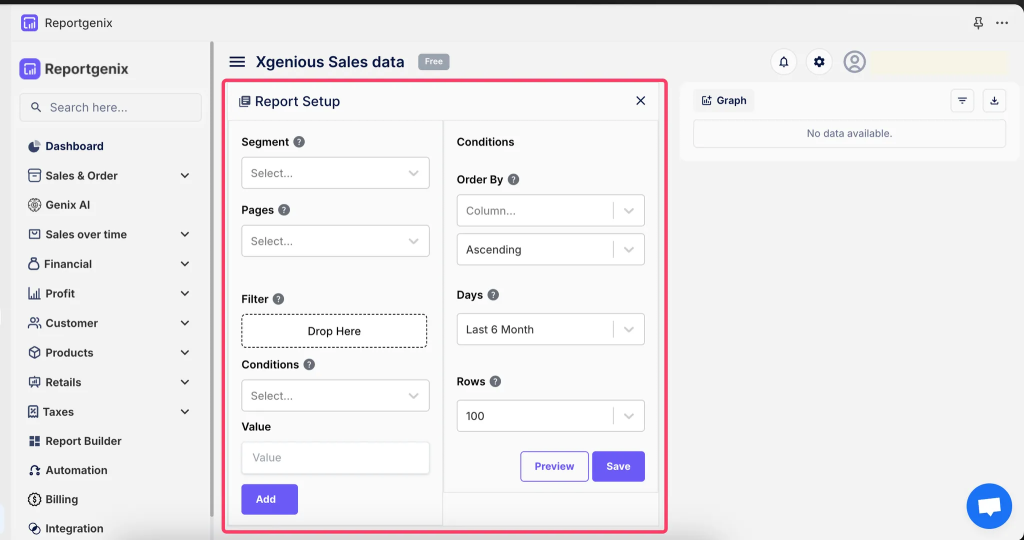
- Adjust the report parameters as needed and save.
- Regularly update your report setup to match changing business analytics needs.
Button Four – Report Automation
Configure automation settings for the report, including:
- Scheduled generation of reports
- Automated email delivery
Click the automation icon.
- Set scheduling options (daily, weekly, monthly).
- Define recipients (through email and slack).
- Automating reports saves time and ensures user receive updated data regularly without manual effort.
Wrap-Up #
The Reportgenix Custom Report Builder is your all-in-one solution for creating, managing, and automating custom reports within your Shopify store. With its intuitive dashboard, flexible customization options, and powerful automation features, you can effortlessly transform raw data into meaningful insights. Whether you’re optimizing operations or tracking performance, Reportgenix puts the power of reporting in your hands—no technical expertise needed. Start building smarter reports today and make confident, data-driven decisions for your business.


